
Light Gaps, Peeling Corners & Silvering: Why Bad Window Tint Always Fails at the Edges First
Key Takeaway
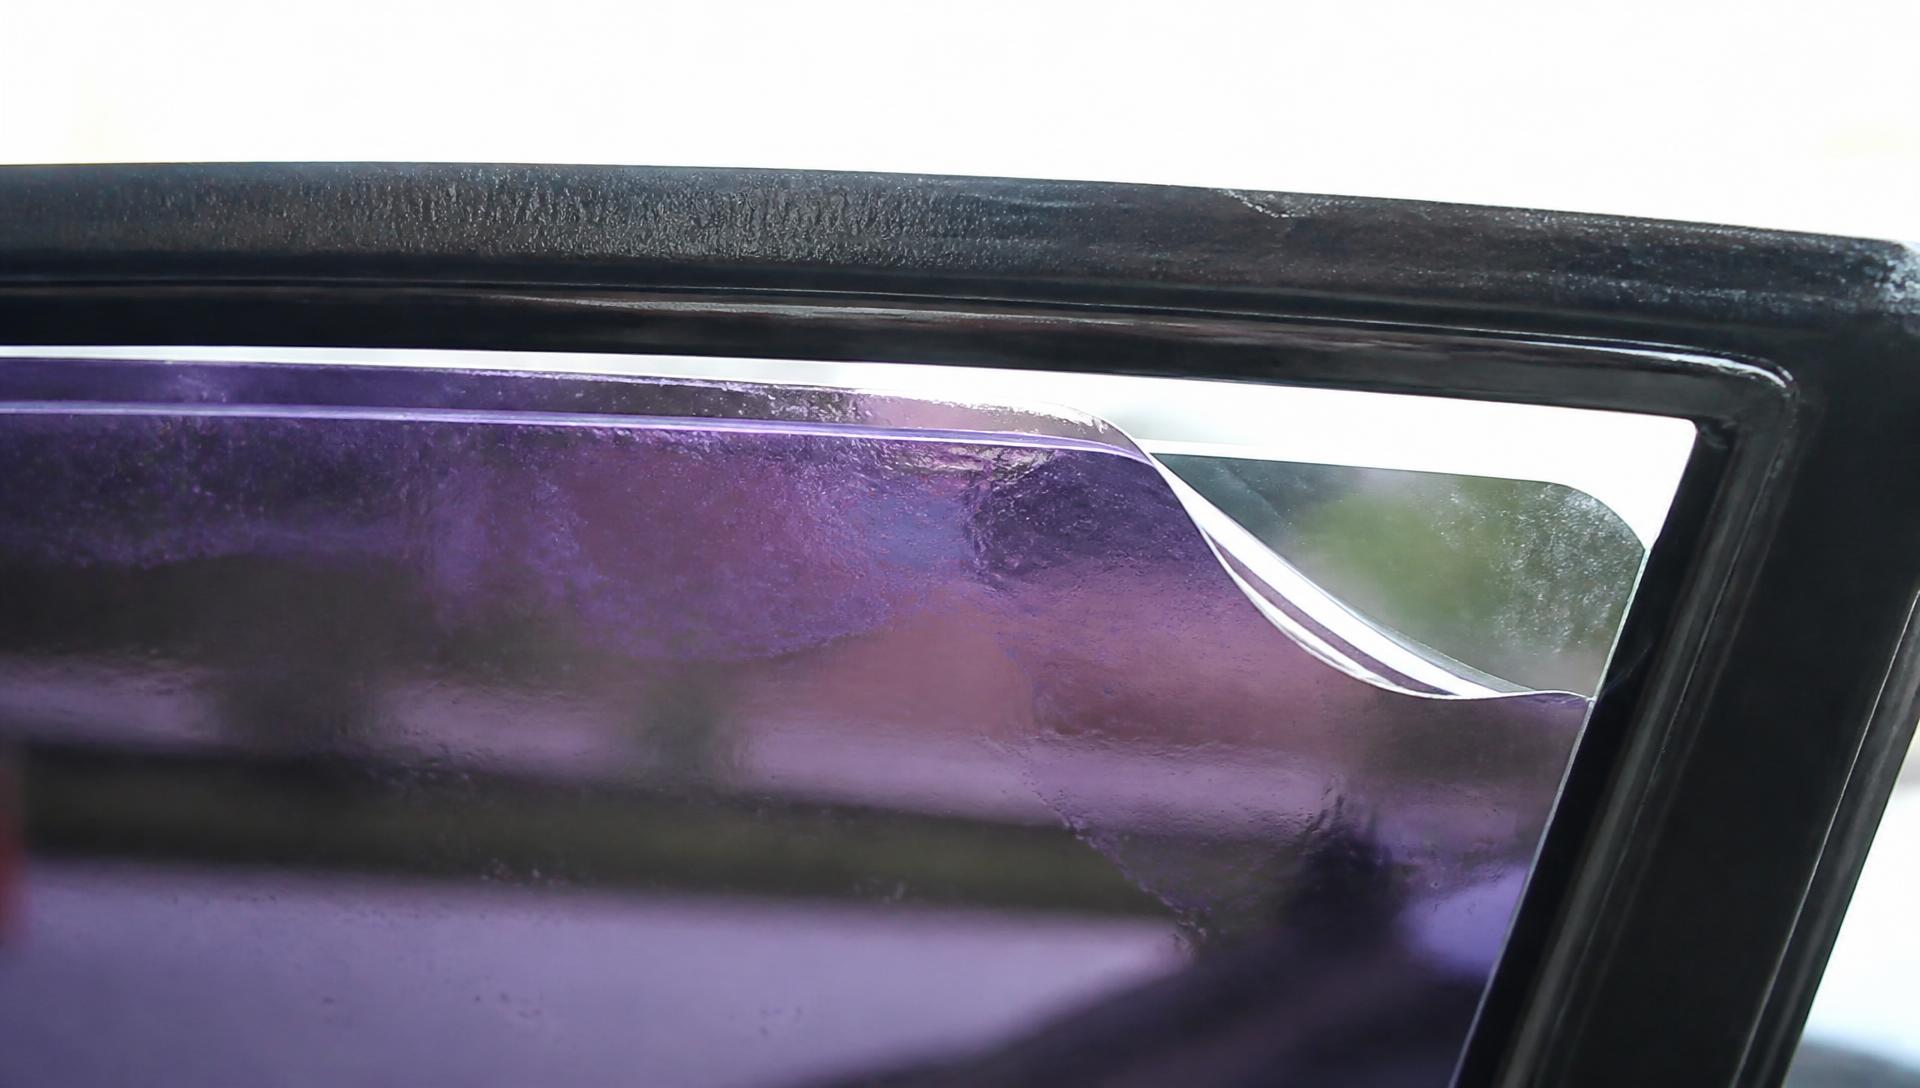
Window tint fails at the edges first because edges take concentrated UV exposure, mechanical abrasion from the window seal, and the first contact with moisture and car-wash pressure, and because installation defects concentrate there. Each symptom identifies a different root cause: a visible light gap means the panel was trimmed in place instead of tucked under the seal; lifted corners mean under-squeegeed adhesive or contamination; bubbles across the panel mean adhesive hydrolysis in a dyed film; silvering means delamination of a metallized film; and purple color means the organic dye has oxidized. Once adhesive has released, panels cannot be repaired — the film must be removed to bare glass and replaced.
Nobody calls us when their tint is 90% fine. They call when a corner has curled up on the driver's door, or when the back glass has gone the color of an old grape soda. In most of the failures we inspect, the problem started at an edge, because edges absorb the most UV exposure, the most seal friction, and the most installation shortcuts at once — though the exact cause still varies by film brand, installer, and how the vehicle is used, so an in-person look is the only reliable way to confirm what's actually happening before paying for any repair.
Why Edges Go First
- Concentrated UV. An exposed edge with no seal protection takes direct ultraviolet load. Southern California sits in the "very high" band on the EPA UV Index most of the year.
- Mechanical abrasion. Every window cycle drags the rubber seal across the film's border, hundreds of times a month.
- Moisture ingress. Rain, marine layer condensation and pressure-washer wands at the car wash all reach adhesive at an edge before anywhere else.
- Thermal cycling. Parked cabin glass in a San Diego summer swings from ambient to well over 150°F daily, per National Weather Service vehicle heat data. Film and glass expand at different rates and the differential is resolved at the edge.
- Workmanship defects concentrate there. Short trims, dust caught in a corner, adhesive that never got a full squeegee pass.
Diagnose Your Tint: Symptom → Root Cause → Fix
| What you see | What it means | Fix |
|---|---|---|
| Clear band 1/8–1/4" at the top of door glass | Panel trimmed in place; never tucked under the seal | Remove and re-cut that panel properly |
| Lifted, curling corner | Contamination or under-squeegeed adhesive at the corner | Replace panel — a lifted corner never re-bonds |
| Field of small bubbles across the panel | Adhesive hydrolysis; typical of dyed film at year 2–4 | Full removal and retint in ceramic |
| Purple or magenta color shift | Organic dye oxidized; film is chemically spent | Full removal and retint |
| Silvery, mirror-like patches | Delamination of a metallized film's layers | Full removal; move to non-metallic ceramic |
| Vertical creases fanning from rear-glass corners | "Fingers" — film never properly heat-shrunk | Replace panel |
| Dark specks / hairs under the film | Airborne contamination during install | Replace panel; cannot be extracted |
| Hazy milky look on a new install | Normal water cure, not a defect | Wait 3–30 days; do not roll windows down |
| Scratched, cloudy film surface | No scratch-resistant hardcoat, or ammonia cleaners used | Replace; switch to ammonia-free cleaner |
The Light Gap Deserves Its Own Section
It is the most common defect we find and the most misunderstood. Customers assume a clear border is how tint works. It isn't. On a deep-seal door, roughly a quarter inch of glass sits inside the rubber; a plotter-cut panel is sized past that line, tucked while the glass is down, and captured by the seal when the glass comes up. Trimming with the blade against the glass in the door physically cannot reach that line without cutting rubber — so the installer stops short, and the exposed border becomes the failure origin. Full explanation in plotter-cut vs hand-cut window tint, and a real-world strip-and-redo in our Hummer H1 case study.
Repair or Remove & Retint? A Simple Decision Matrix
| Situation | Recommendation | Typical SD/OC cost |
|---|---|---|
| One panel failed, rest is quality ceramic under warranty | Single-panel replacement, warranty claim first | $0–$90 |
| One panel failed, rest is unbranded dyed film | Remove all — the rest is on the same clock | $249–$650 total |
| Purple or bubbling across multiple windows | Full removal + ceramic retint | $249–$700 |
| Light gaps only, film otherwise sound | Re-cut the affected panels | $60–$180 |
| Lease turn-in within 6 months | Remove only — do not retint | $99–$300 |
Ranges reflect 2026 San Diego and Orange County mobile and shop pricing; heavily degraded adhesive and rear defroster glass sit at the top of each range.
Lease turn-in is its own scenario with its own math — see lease return tint removal.
Why Removal Is the Part That Damages Cars
Rear glass is the danger zone. Defroster grids are printed conductive silver lines that a razor destroys instantly, and their solder tabs pull off if the film is yanked. Correct removal is steam or controlled heat, a slow full-sheet peel where possible, then adhesive dissolution and plastic-blade work — with ammonia-free chemistry and no blade contact on the grid. DIY attempts are the number one source of the ruined defrosters we see; we walked through the whole comparison in professional vs DIY tint removal. Our stand-alone service is at window tint removal.
How to Never Deal With This Again
- Buy nano-ceramic, not dyed. Ask for the brand and product line by name.
- Confirm the doors are plotter-cut and the film tucks under the seal.
- Get the warranty in writing — bubbling, peeling, purpling, fading, and whether it is transferable.
- Leave the windows up for the full cure period the installer specifies.
- Clean with ammonia-free product and a microfiber towel only; ammonia attacks film adhesive and hardcoat.
- Inspect the borders in daylight before you pay, not a week later.
Consumer guidance on film performance and installation standards is published by the International Window Film Association, UV health context by the Skin Cancer Foundation, and California legality by CVC § 26708.
BestAutoTechs removes and replaces failed tint across San Diego County and Orange County at your home or office. Send a photo of the failing edge and we can usually tell you the cause before we arrive — (858) 977-2693.
Frequently Asked Questions
Why does window tint always start peeling at the corners and edges?
Edges carry every stress at once. They receive the most concentrated UV exposure because they are the least protected part of the panel, they get mechanically scrubbed by the window seal every time the glass moves, they are where moisture and car-wash pressure first reach the adhesive, and they are where installation defects such as short trims, contamination and under-squeegeed adhesive concentrate. Once the bond releases at an edge, air and water travel inward and the failure spreads across the panel.
Can bubbled or peeling window tint be repaired without replacing it?
Almost never on a single panel that has already released. Adhesive failure is chemical, not cosmetic — reheating or re-squeegeeing a bubbled panel may flatten it briefly but the bond is gone and it returns within weeks. The correct fix is to remove the film from that window entirely, clean the glass down to bare, and install a fresh panel. The only genuine repairs are for fresh installs still in the cure window, where trapped water hazing clears on its own in 3 to 30 days.
What does purple window tint mean?
It means the film is dyed, and the organic dye has oxidized under UV. Neutral gray dyes bleach unevenly and the residual color reads purple or magenta. Purple film is chemically finished — its UV and heat rejection have already dropped well below spec — and it will continue toward bubbling. Ceramic and carbon films use inorganic pigment and particles that do not oxidize, which is why they hold color for the life of the vehicle.
Is a light gap around my tint a defect or normal?
On door glass it is a workmanship issue, not a normal outcome. A properly cut door panel extends past the visible opening and tucks under the weather seal so no clear border shows when the window is up. A visible 1/8 to 1/4 inch band is the signature of film trimmed in place on the glass, and it is where UV and seal abrasion attack the adhesive first. Small dot-matrix gaps at the very top of a windshield strip or rear glass frit band are a different thing and are normal.
How much does it cost to remove and replace failed window tint?
In San Diego and Orange County, removal typically runs $99 to $250 for a sedan and $179 to $300 for an SUV, truck or Tesla, depending on how badly the adhesive has degraded and whether rear-glass defroster lines require slow, careful work. Reinstalling quality ceramic film then runs $150 to $400. That total is why buying the cheapest install available is usually the most expensive path — see our full cost breakdown.
Does failing tint affect my rear defroster?
The film itself does not, but removal of failed film can if it is done wrong. Rear defroster grids are printed conductive lines that scrape off easily; an installer who attacks a bad rear panel with a razor or aggressive pulling will break lines or tear the connector tabs, leaving you with a defroster that fogs in patches during coastal marine layer mornings. Correct removal uses steam and controlled peel, never blades on the grid.
Related Window Tint Guides
More from our tint removal research library — each guide covers a different part of the same topic.
- lease return window tint removalLease Return Window Tint Removal: The Step-by-Step Guide to Avoiding Dealer Fees in San Diego & Orange County
- bubbling window tint repairBubbling, Purple, or Peeling Tint? San Diego Tint Repair Guide
- diy vs professional tint removalProfessional vs DIY Window Tint Removal: A Real Customer Comparison
- factory tintFactory Tint Isn't Window Tint: What Your Privacy Glass Really Does (and Doesn't)
- Tesla Model Y window tinting San DiegoTesla Model Y Ceramic Window Tint San Diego
- ceramic vs carbon window tint San DiegoCeramic vs Carbon Window Tint San Diego: Worth It?
What Our Customers Say
Get Your Free Tint Quote in 60 Seconds
Premium mobile window tinting across San Diego & Orange County. We come to your home, office, or anywhere convenient — same-week appointments available.
GET YOUR FREE QUOTE
Service Type *
Add-ons (optional)